Malware Lab
Creating your own lab for malware analysis using Qemu/KVM.
- published
- reading time
- 4 minutes
One of the key aspects of analyzing malware is having a safe environment in which we can detonate malware without any danger. In this guide we’ll set up our own lab using qemu/kvm stack.
Let’s start with the basics.
What is KVM, Qemu and libvirt ?
These three components are system tools, services or features that enable us to virtualize.
- KVM (Kernel-based Virtual Machine) is an open source virtualization technology for Linux OS. It allows Linux to function as a hypervisor that runs multiple, isolated VMs.
- Qemu (Quick Emulator) is a generic and open source machine emulator and virtualizer. The most common use is for System Emulation, where it provides hardware such as Disk, network and USB. Even though the CPU can be fully emulated, it may work with a hypervisor like KVM to allow the guest to run directly on the host CPU.
- libvirt is an opensource API, daemon and management tool for managing platform virtualization. It can be used to manage KVM, Xen, VM-Ware, Qemu, etc. APIs are consumed by client tools for provisioning and managing VMs.
Why qemu?
In my experience qemu is insanely fast and incredibly reliable when it comes to virtualization.
The stack starts with KVM that is placed basically at the kernel level allowing almost native CPU perforance on the VMs, then we have qemu that will basically let us emulate resources and manage them easily. At last we’ll have libvirt which will let us interact with the VMs we created through APIs. Cool, but how do we use all this stuff? The client tool we’ll be using with this stack is called virt-manager. This application will allow us to manage KVM virtual machines through libvirt, it’s a GUI alternative to virsh and it contains a VNC and SPICE client for direct graphical access to VMs.
If you don’t know how to build or install qemu you can check it here!
In order to install virt-manager you can check it here!
Something I like to do is having an alias set in my ~/.zshrc file in order to deploy a fast VM with a NAT Network for whenever I need to do some quick downloads, installing packages, update and upgrade a system. First, I like stacking all my image and ISOs in /var/lib/libvirt/images directory. That way i keep everything somewhat organized. To make an image we can simply use virt-manager and create a new virtual machine using an ISO, but i like creating mine from the command line:
cd /var/lib/libvirt/images
sudo qemu-img create -f qcow2 <imageName.img> <sieze_of_image>
After this creation we can boot our ISO image:
sudo qemu-system-x86_64 -enable-kvm -cdrom </path/to/your/OS.iso> -boot menu=on -drive file=</path/to/imageName.img> -m 4G -cpu host -smp 2 -vga virtio -display sdl,gl=on
After installation I would then add an alias to my zshrc as said before, for example this is what I have:
alias malbian='sudo qemu-system-x86_64 -enable-kvm -boot menu=on -drive file=/var/lib/libvirt/images/malbianXfceImage.img -m 4G -cpu host -smp 2 -vga virtio -display sdl,show-cursor=on'
This way I can just type ‘malbian’ as if it were a command and I can run my VM from the command line!
Okay so, for malware we don’t need a NAT Network format, we kinda need a super private network where only the guests can communicate with each other and ignore the host completely. To do this we need to create a special Isolated Network:
<network>
  <name>Private</name>
  <uuid>d6b7b5fd-cf36-4f3d-acae-d7a384582398</uuid>
  <bridge name="virbr2" stp="on" delay="0"/>
  <mac address="52:54:00:4e:ce:dd"/>
  <domain name="Private"/>
</network>
Note: To do this you need to go to ‘Edit > Connection Details > Virtual Networks Tab’ and down click the plus sign.
This is the simplest way to do it, that’s why we follow libvirt’s configuration. This also means that we won’t have DHCP enabled, but thats no problem we can set our IP Addresses manually or add another VM to work as a DHCP server. In my case, I like to set up the IPs manually.
Okay, now that we have our network setup we need to run our VMs and set their IP address. I normally run a Malbian Linux instance and a Windows 10 Instance. In our Guest Linux Machine (Malbian) we’re gonna set our desired IP addres after stopping the NetworkManager daemon down:
sudo systemctl stop NetworkManager
sudo ip addr add 10.10.10.3/24 dev enp1s0
For windows, we’ll do the same but in a gui format cause you know… it’s windows:
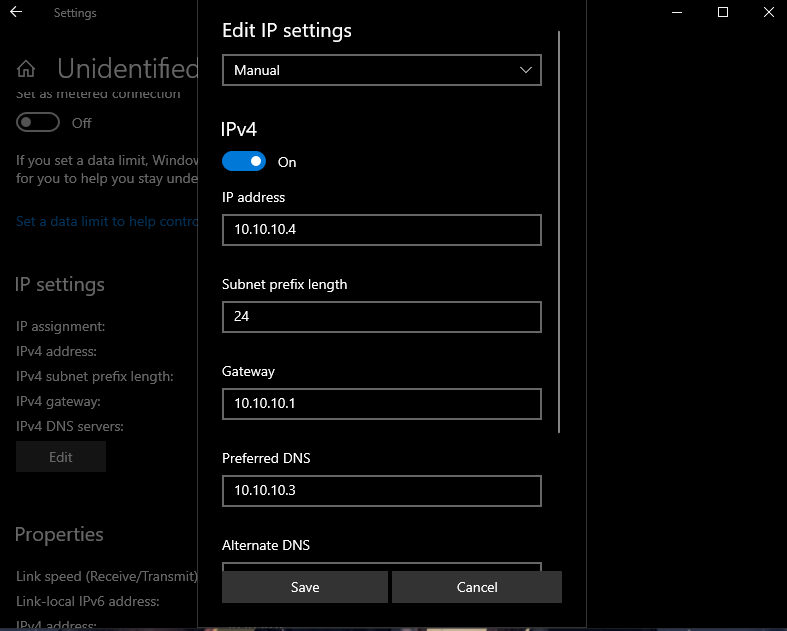
Note that we already stablished the DNS pointing towards our Linux box, this is so we can run INetSim effectively.
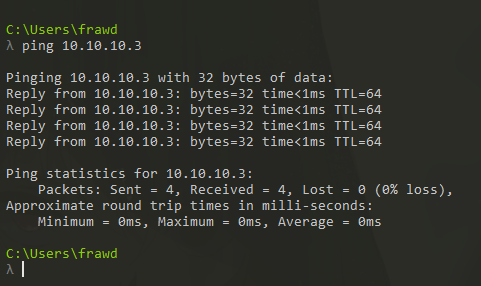
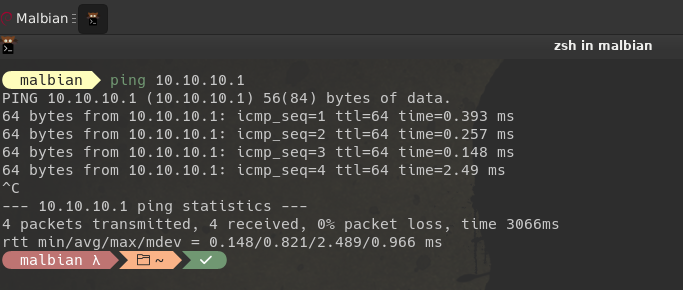
That’s all, now we have communication between the windows box and linux box:
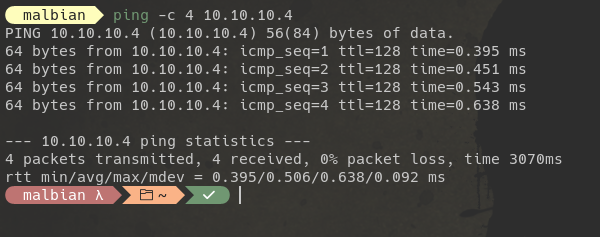
And between Linux and Windows:
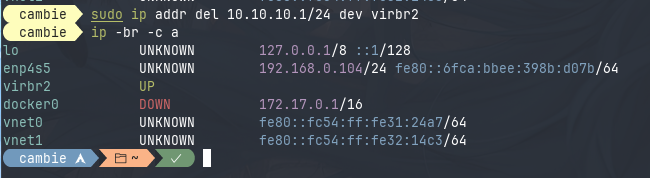
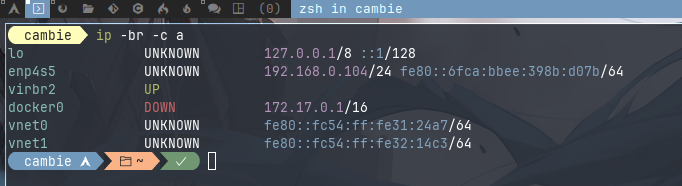
Looking at our Host machine, we can see that we don’t have any ip address in that ‘virbr2’ interface, so we can’t communicate with it:
However, as you can see, we can set up an ip if we like so we can communicate with our guest machines:
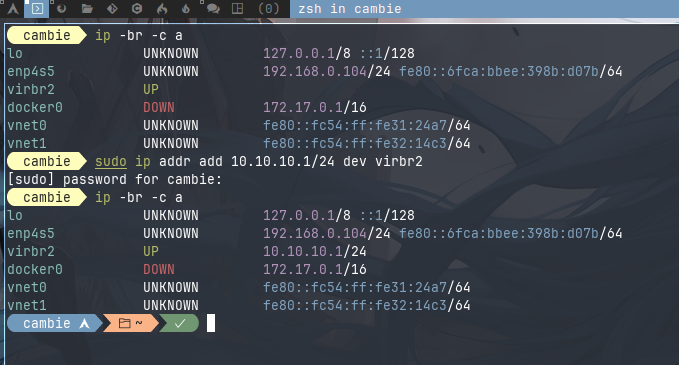
I cover this just in case you need it, but it’s obviously not recommended. We can revert this change and go back to the previous config: